First steps in the 1Payment personal account
Step-by-step guide to signing in, configuring your project, and using the main sections of the personal account. For API integration, see Documentation.
What you need
- Login and password issued when you connect to 1Payment.
- Access to the partner personal account: account.1payment.com.
- For staff — separate sign-in: clientpanel.1payment.com.
Initial setup
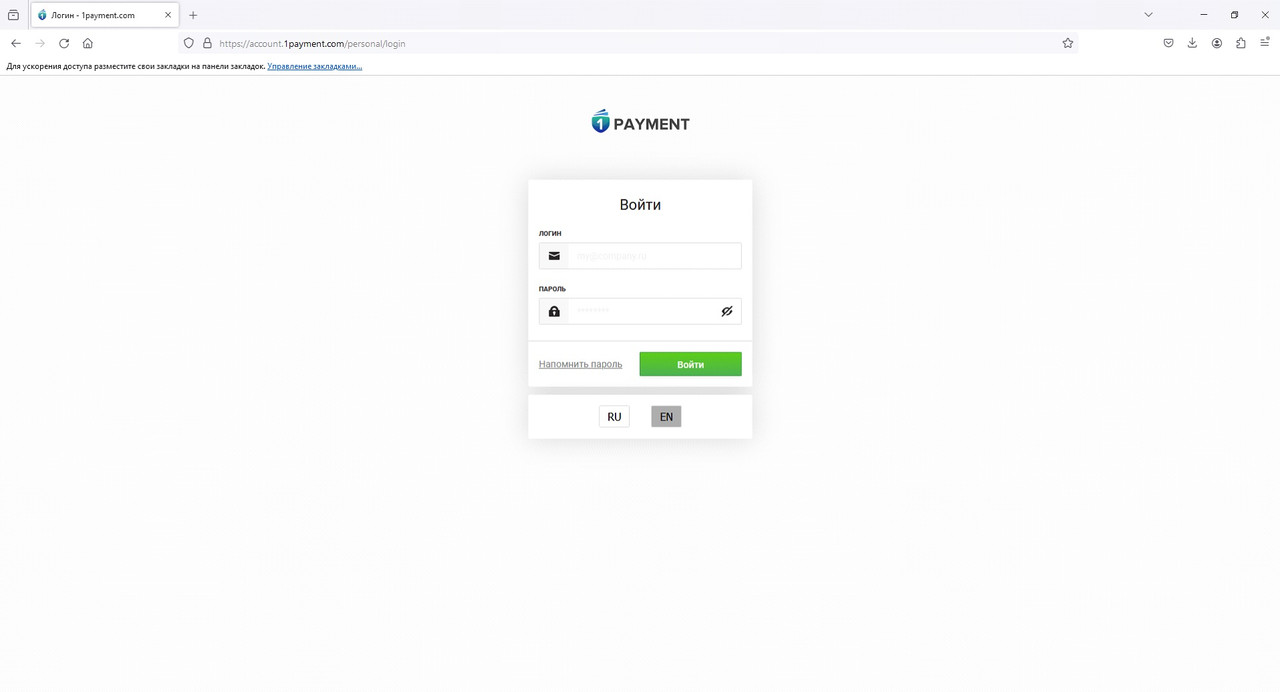
Sign in to the personal account
After receiving your credentials, open the sign-in page and enter your login and password:
Project API key
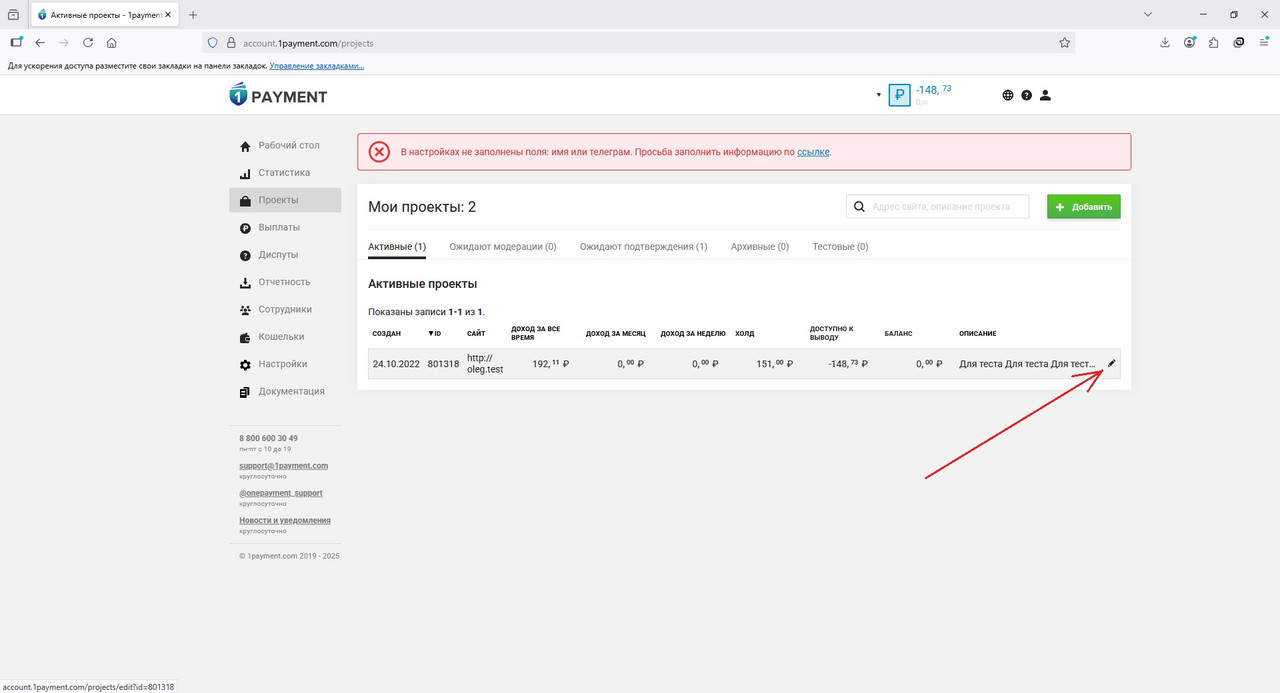
- Go to Projects.
- Open project editing (pencil icon).
- Set the project API key if each site or project uses a separate key.
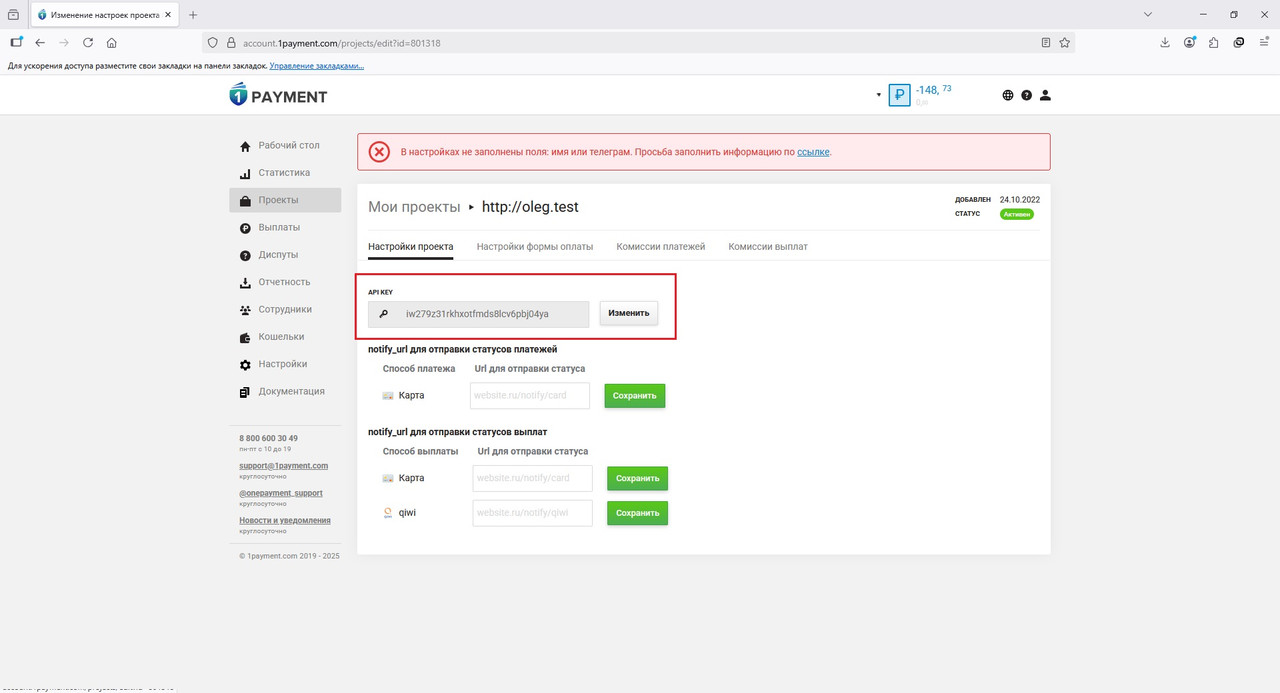
If the API key is not set for a project, the global key from Settings → API settings is used:
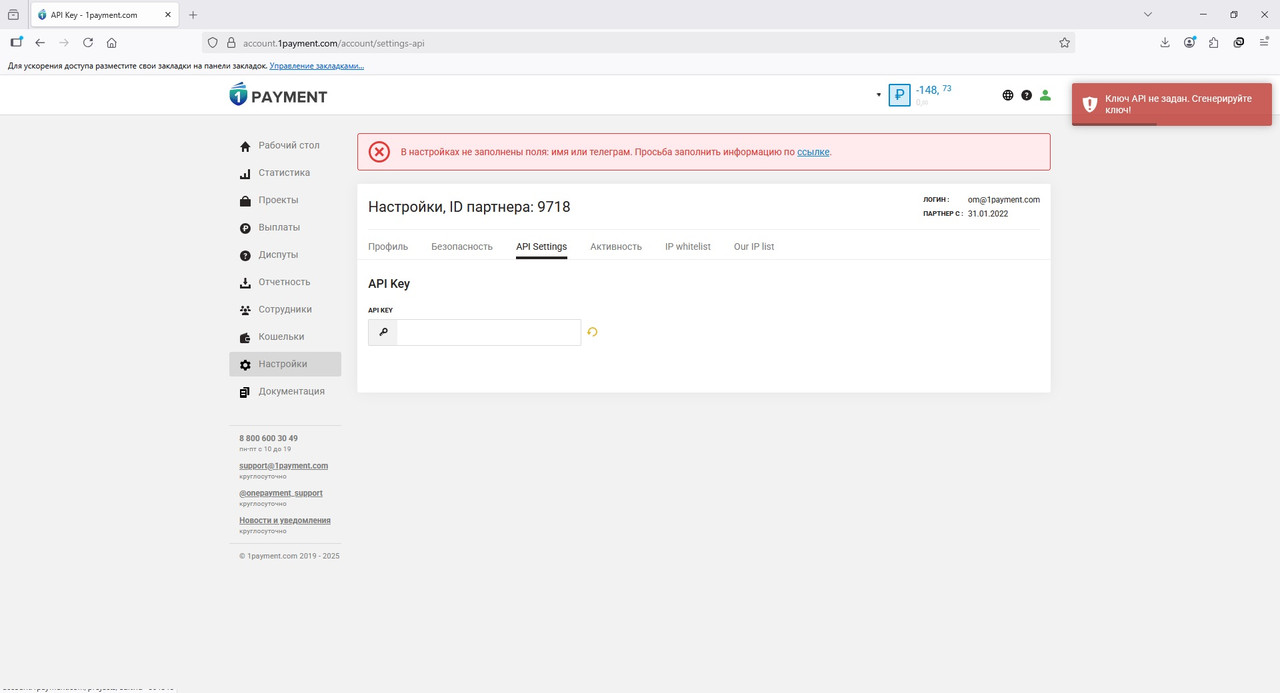
The key is required to sign API requests — see API request format.
Callbacks (notify_url)
Set notify_url in project settings to receive transaction status notifications:
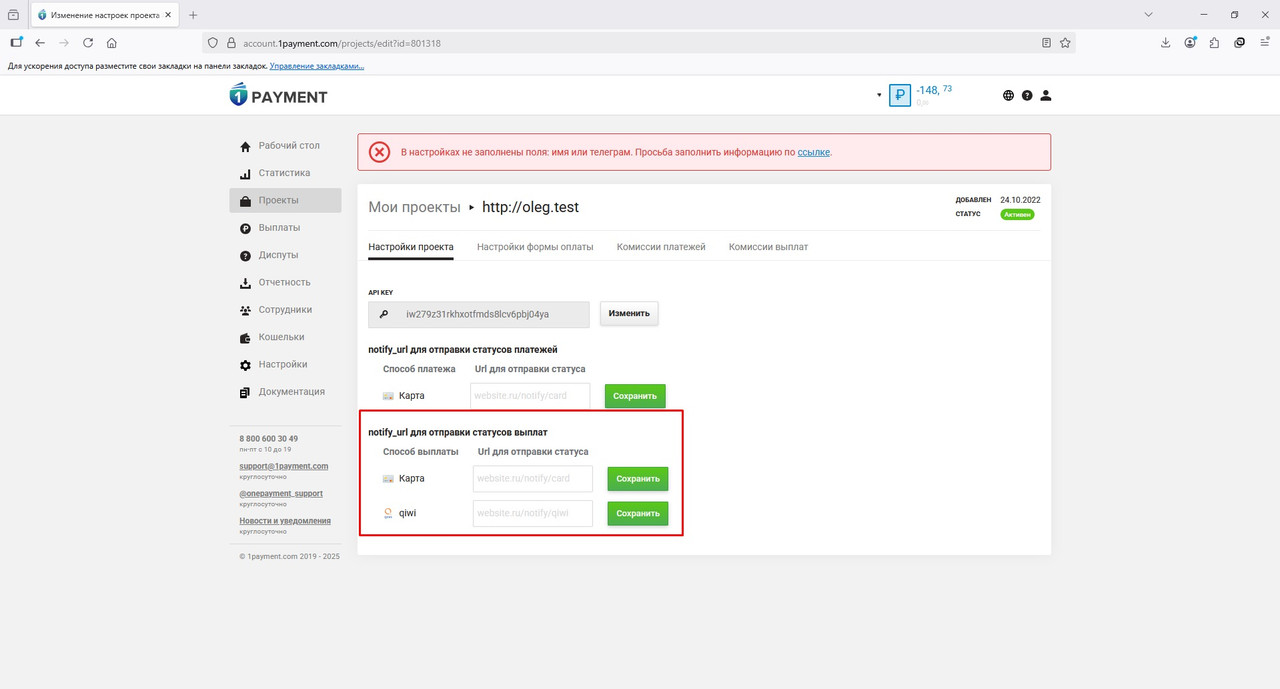
1Payment sends POST callbacks with payment data. Your server must respond with HTTP 200 OK. Format and signature verification — in API request format.
SUCCESS and FAIL URLs (payment form)
When integrating via the payment form, you can set URLs to redirect the payer after successful or failed payment:
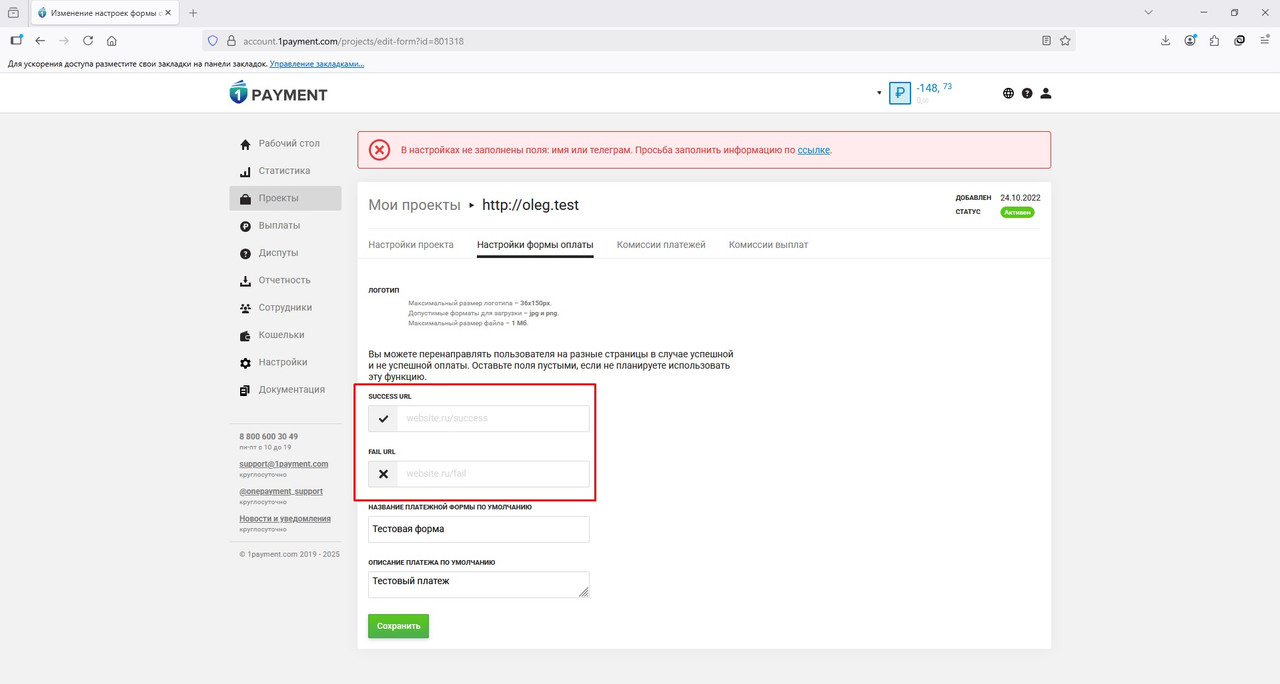
Payment form and GATE (host2host)
- Payment form — redirect the user to the 1Payment page (example: init_form).
- GATE (host2host) — charge without redirect; PCI DSS certificate is required. Contact your account manager and see API documentation.
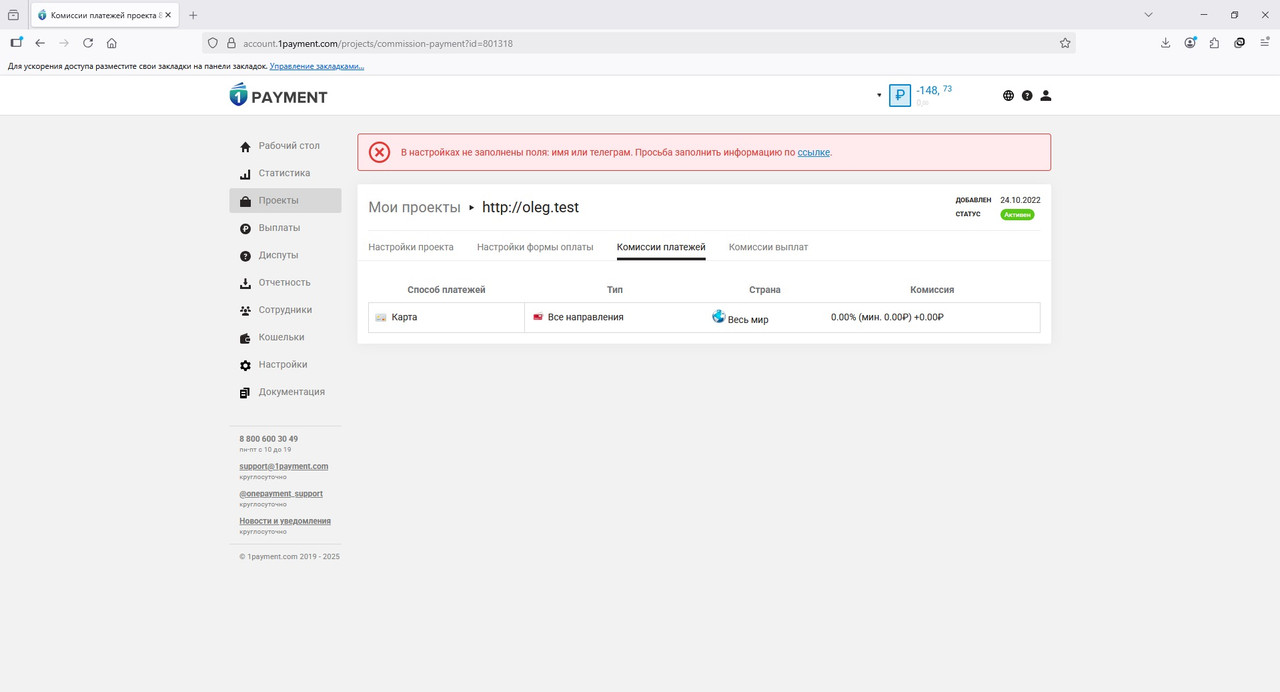
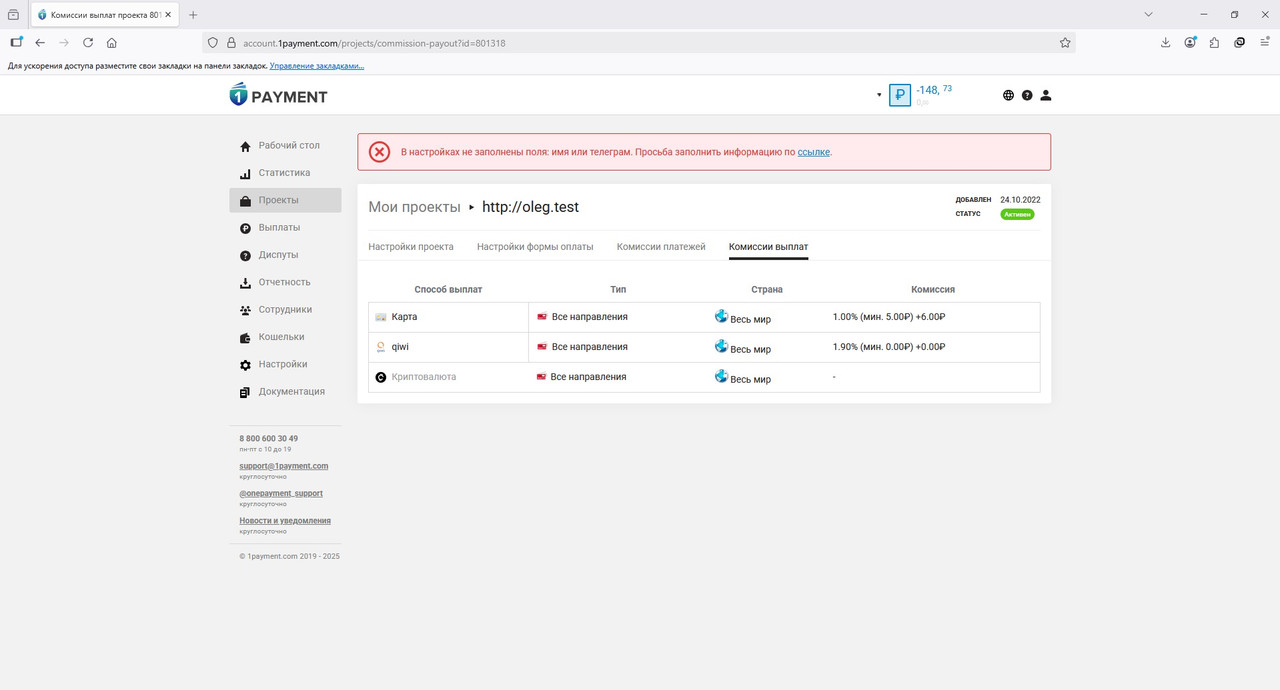
Payment and payout fees
The Payment fees and Payout fees tabs show enabled methods, per-transaction fee, minimum and maximum amounts, and settlement times:
Dashboard
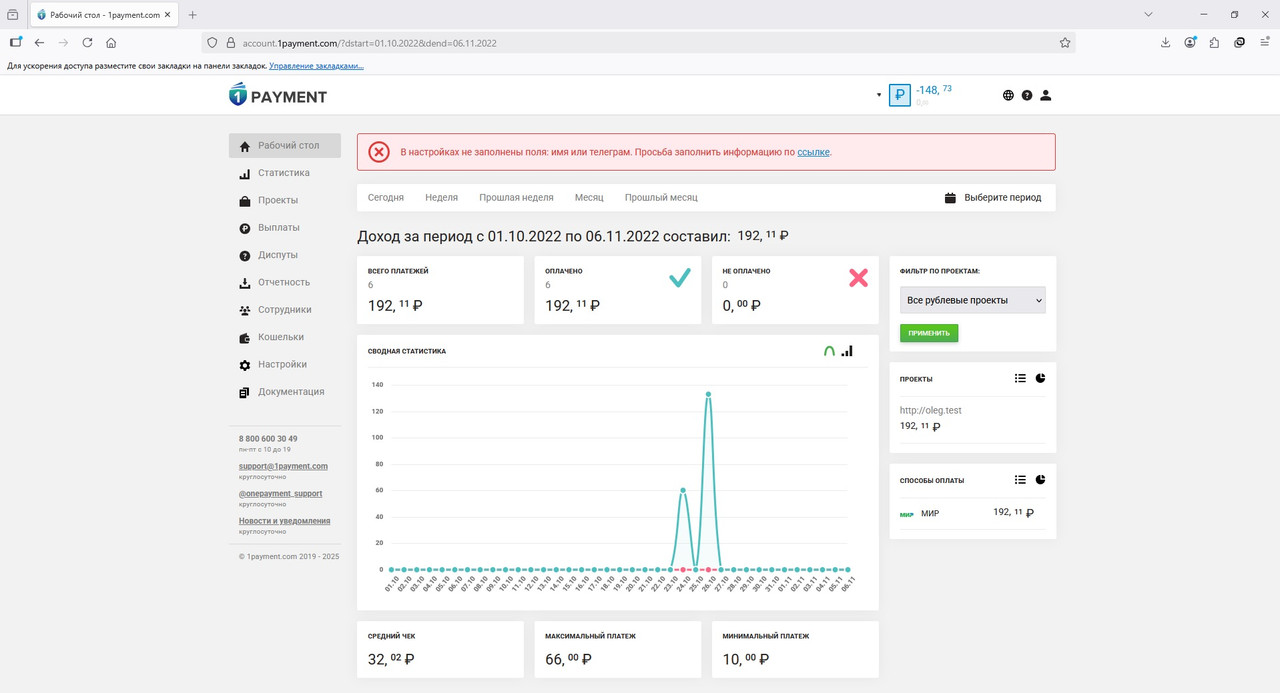
Summary transaction statistics for a period: Today, Week, Last week, Month, Last month, or a custom range (Select period).
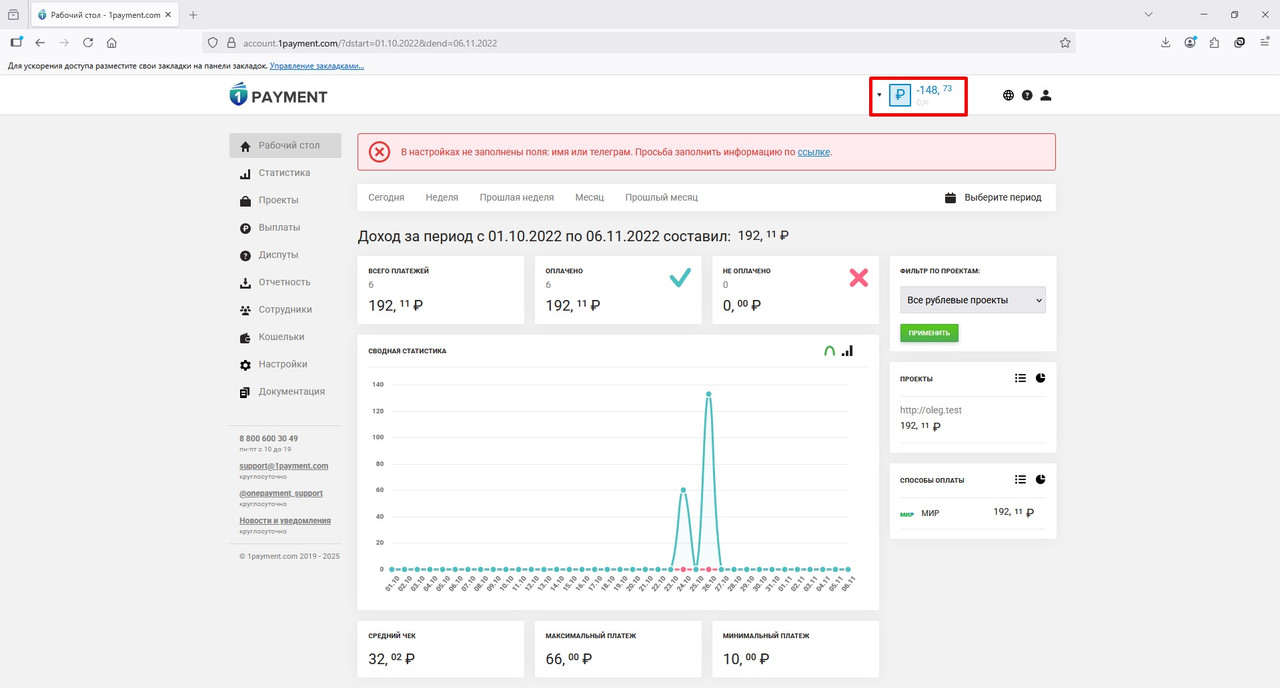
The site header shows two balance figures:
- blue — total payout balance (funds available for withdrawal right now);
- gray — total expected balance (payments accepted during the current day that have not yet been credited to the payout balance).
Funds for the previous day are credited to the payout balance at 11:00 (MSK) on the current day.
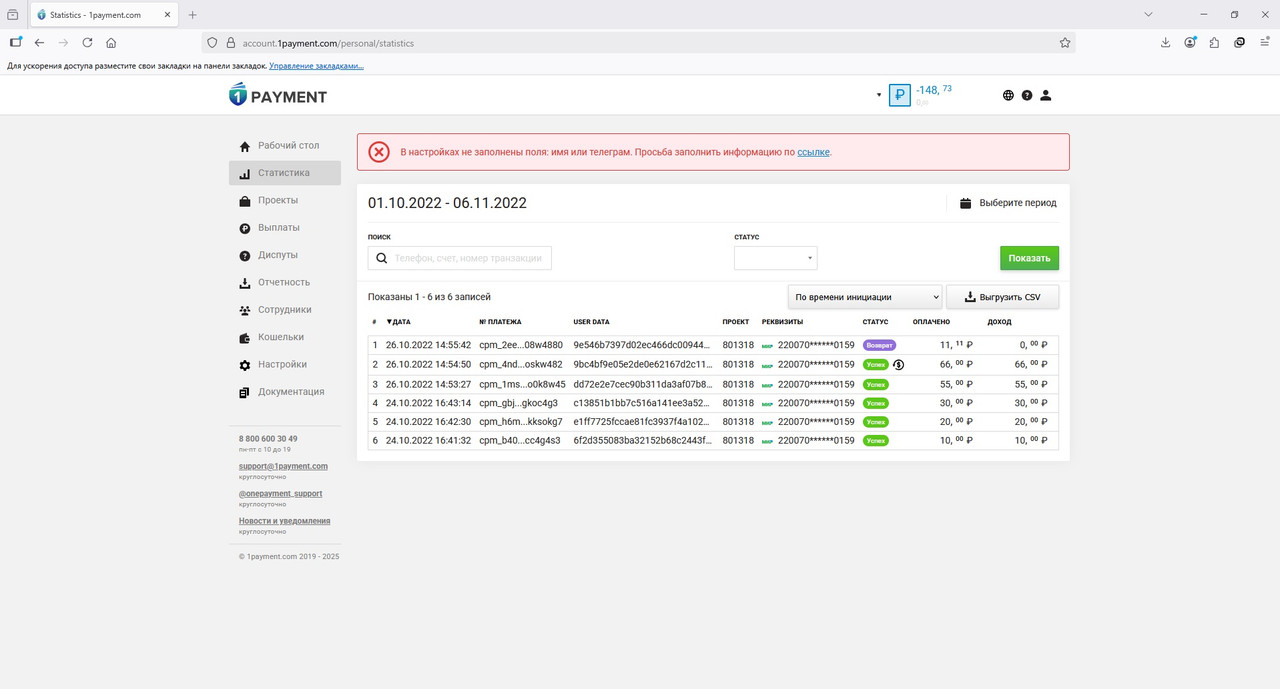
Statistics
Search payments by phone, account, transaction number (order_id or user_data). Export to CSV, filter by project and payment method:
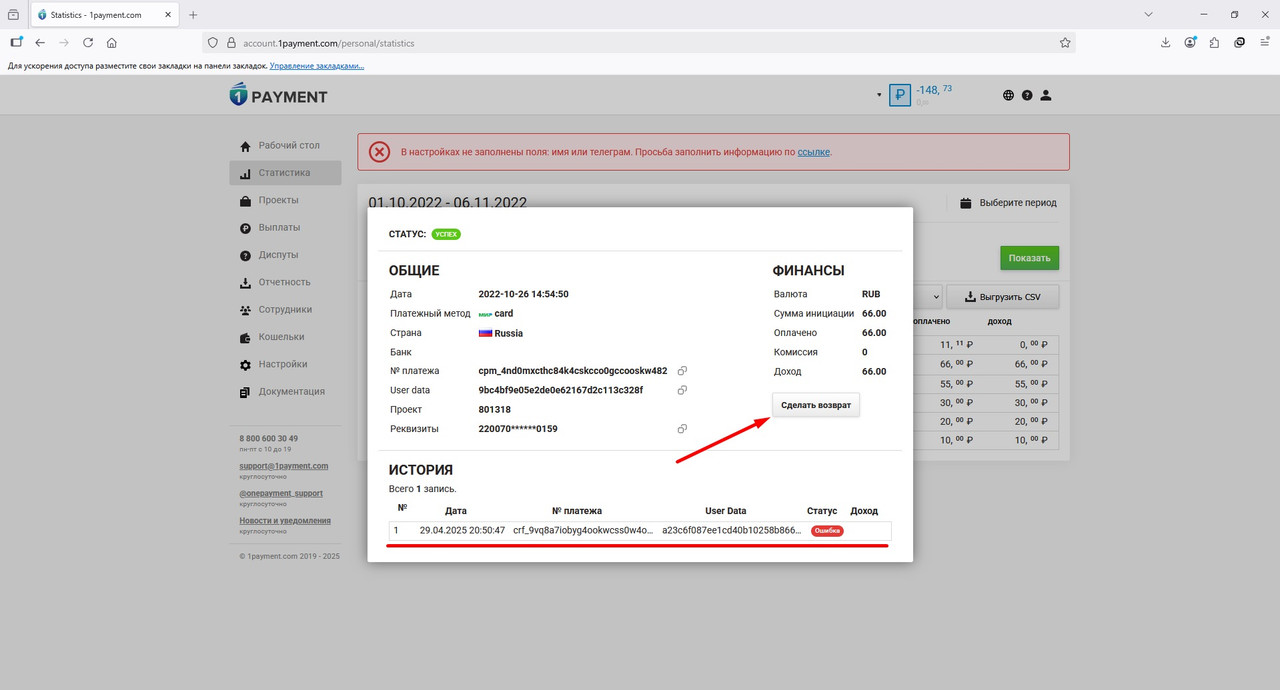
For a selected transaction you can:
- request a refund (full or partial, with amount);
- view refund attempt history.
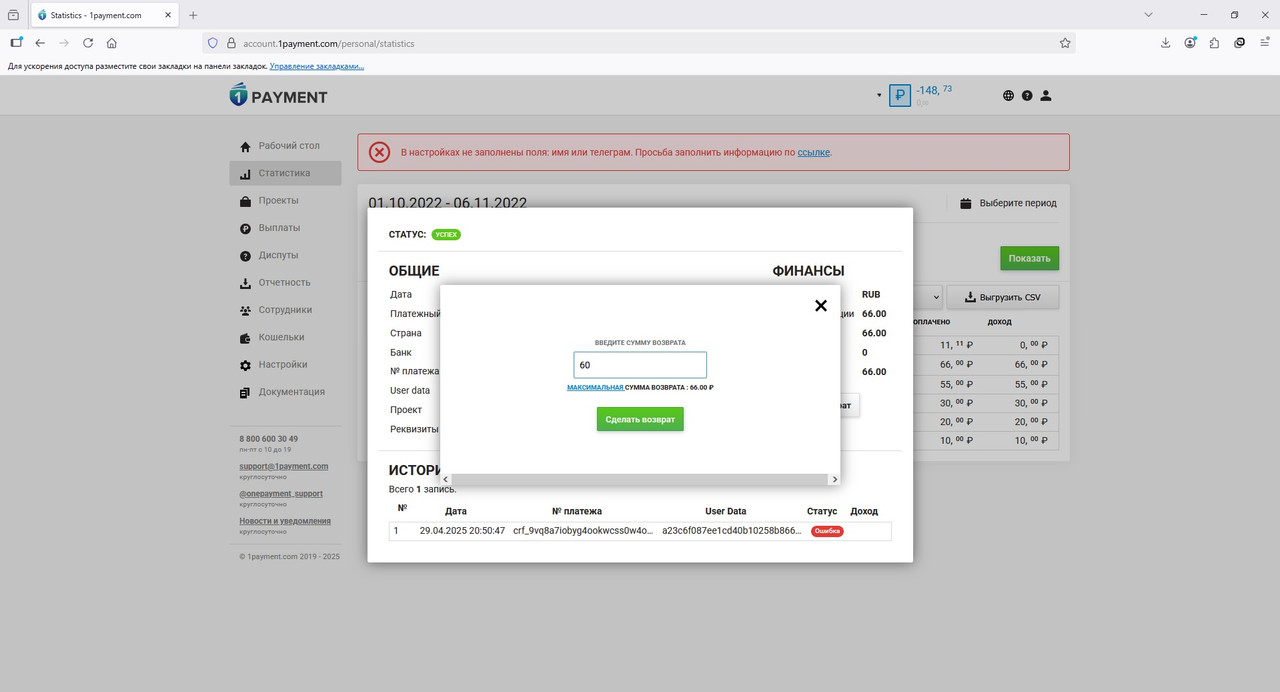
Refunds via API are described in refund documentation.
Payouts
Payout statistics for a period, transaction search, status filter, CSV export by initiation time or status time:
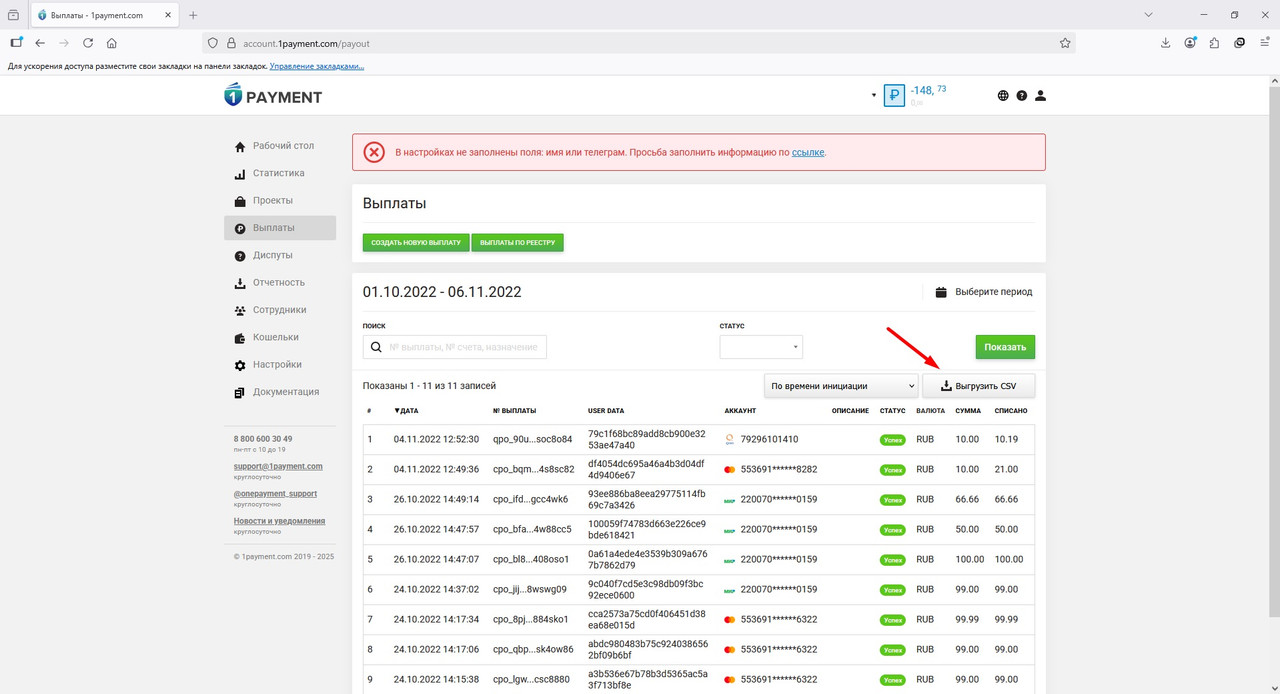
Initiate payouts via API — in the Payouts documentation section.
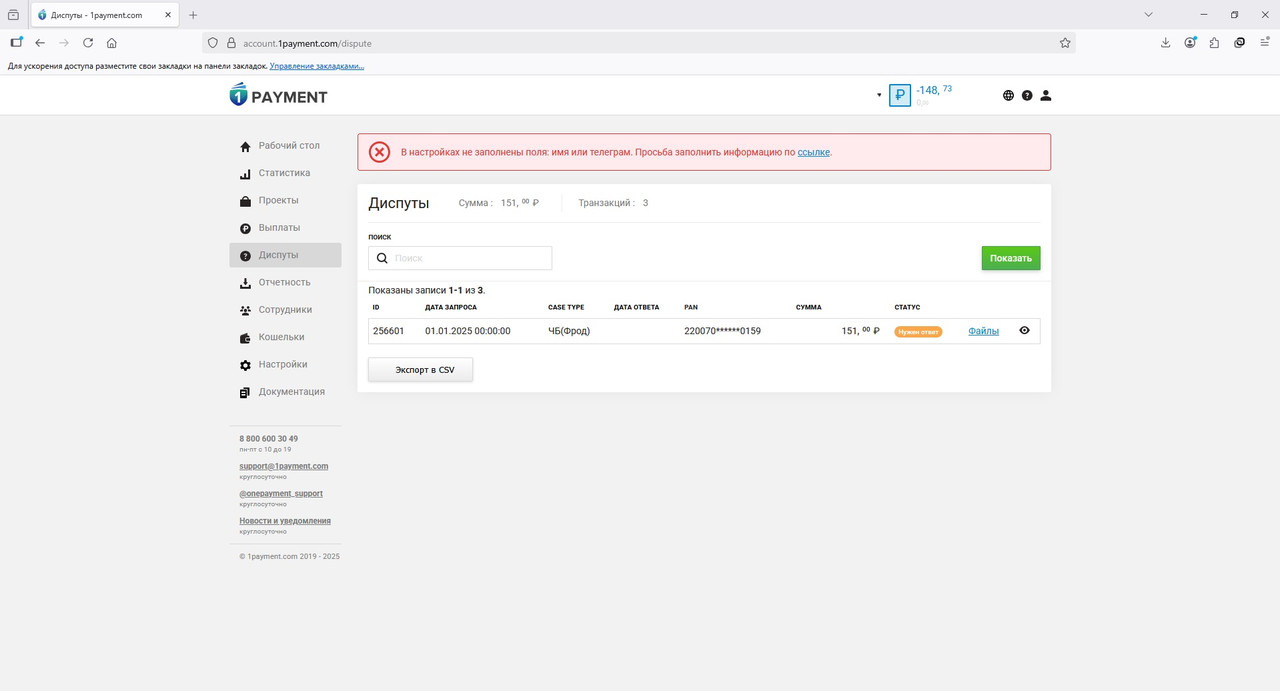
Disputes
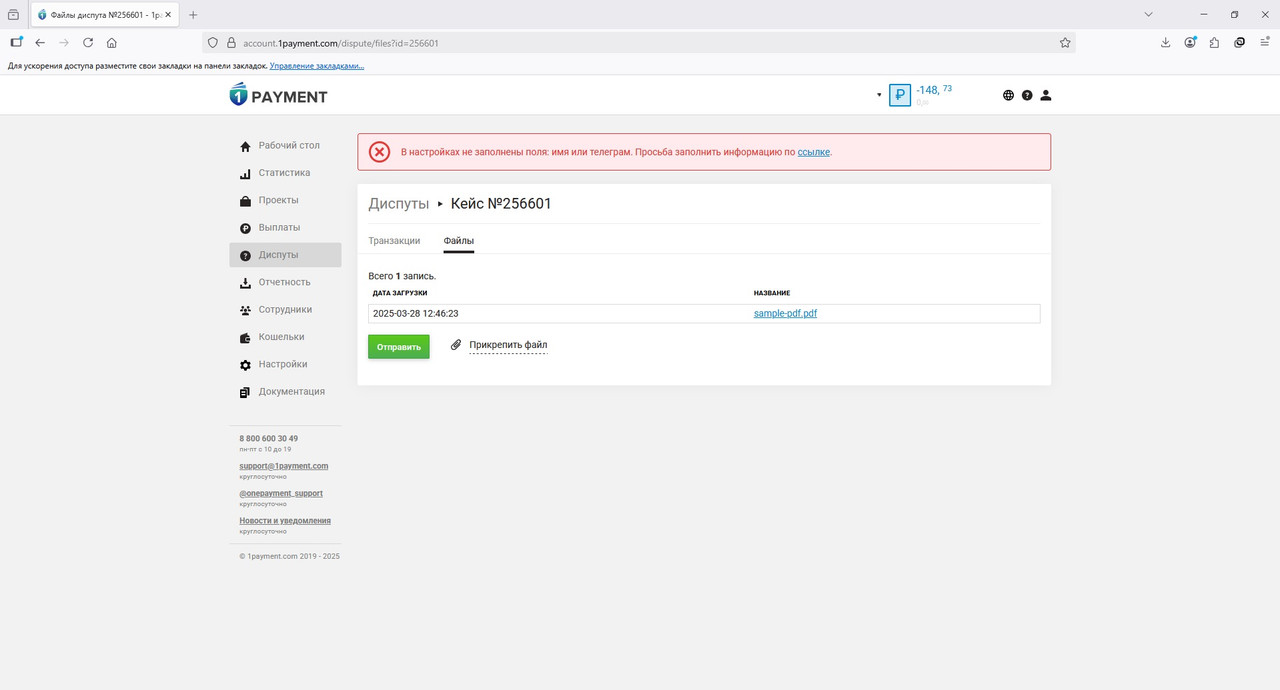
List of chargeback cases. Respond by attaching documents: Files → Send.
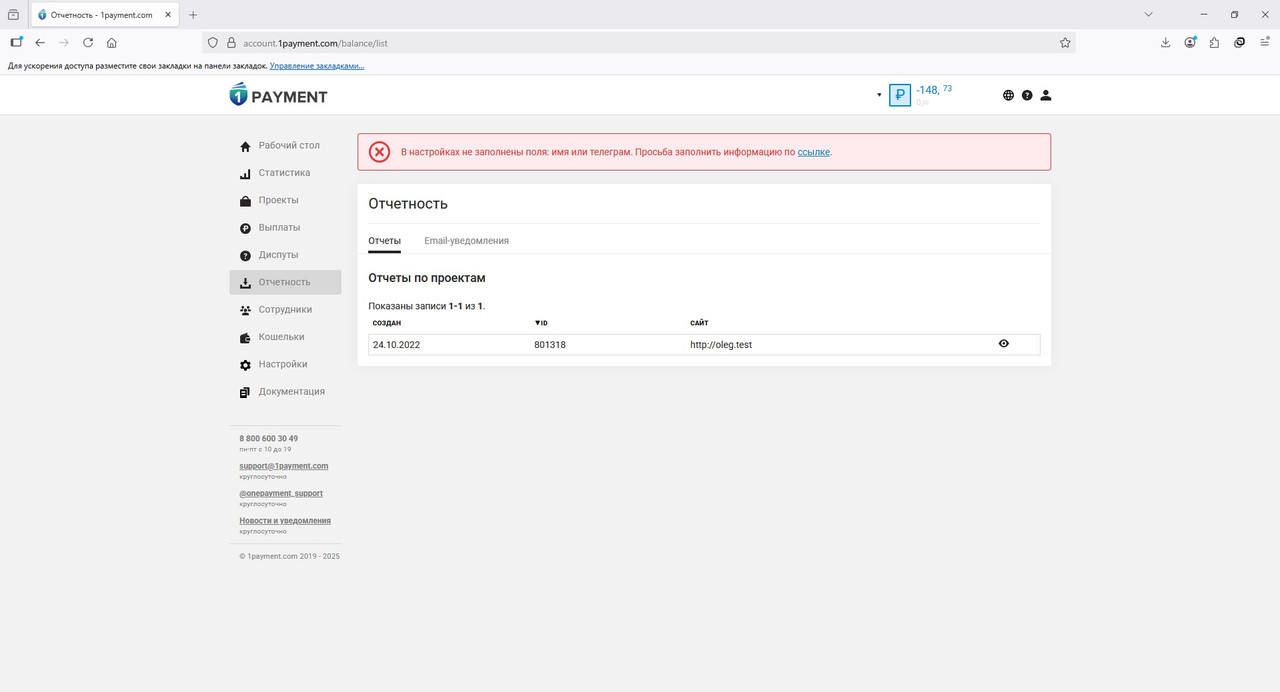
Reporting
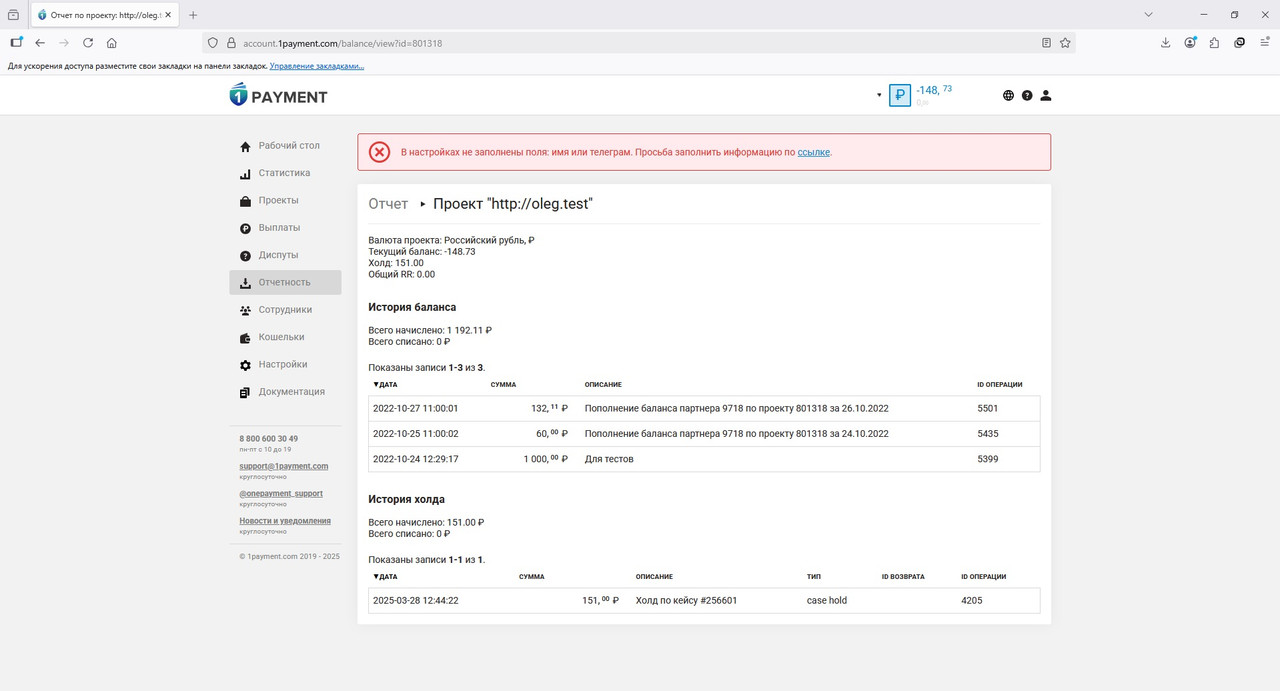
Project currency, balance credit history (by default funds are available for payout the next day), holds (chargeback reserves):
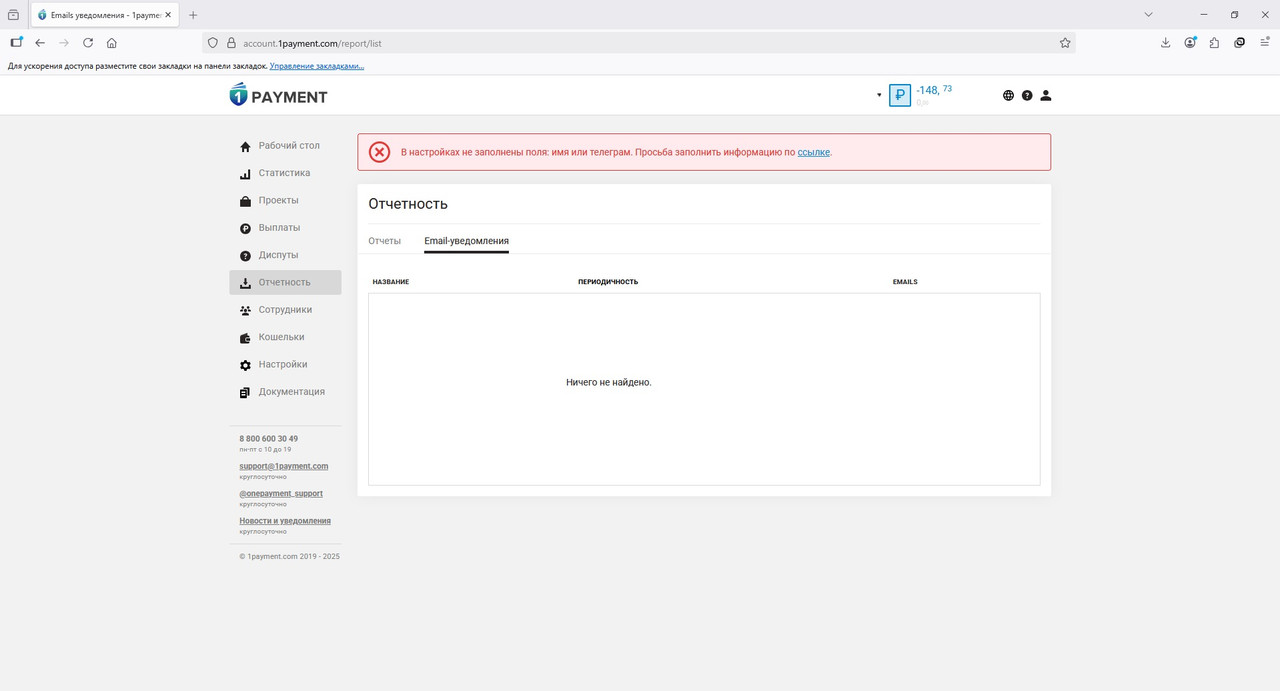
Configure automatic payment registry email delivery:
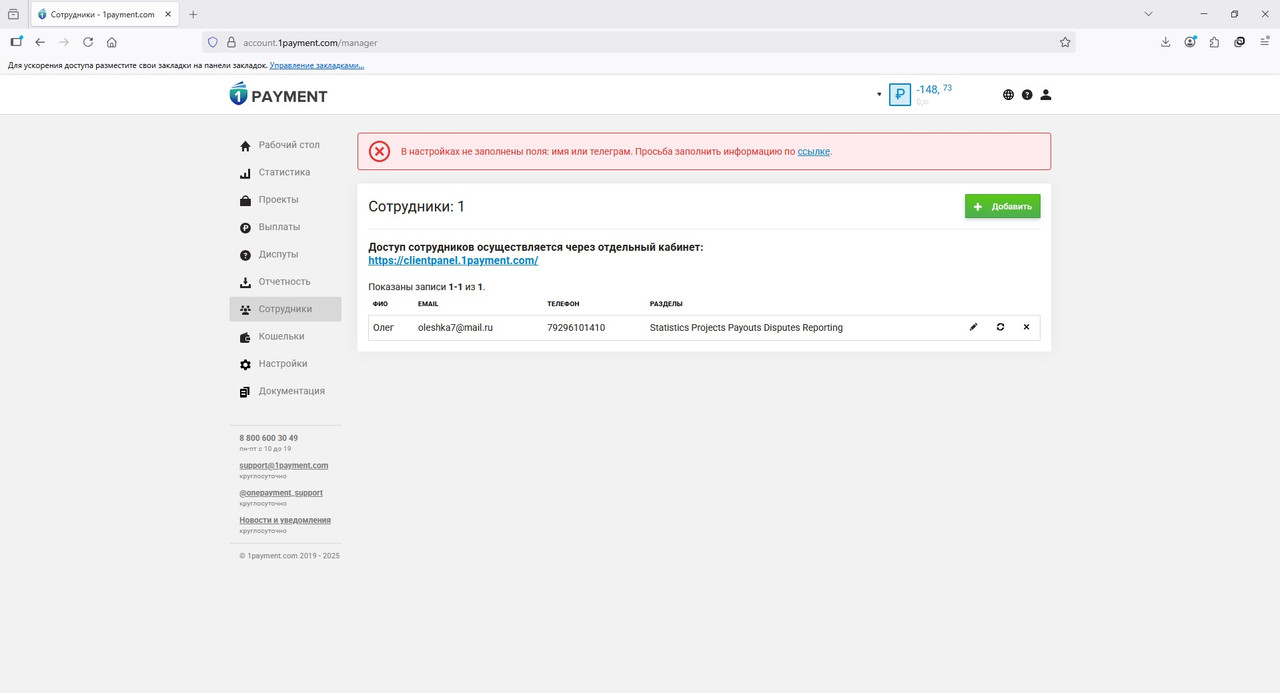
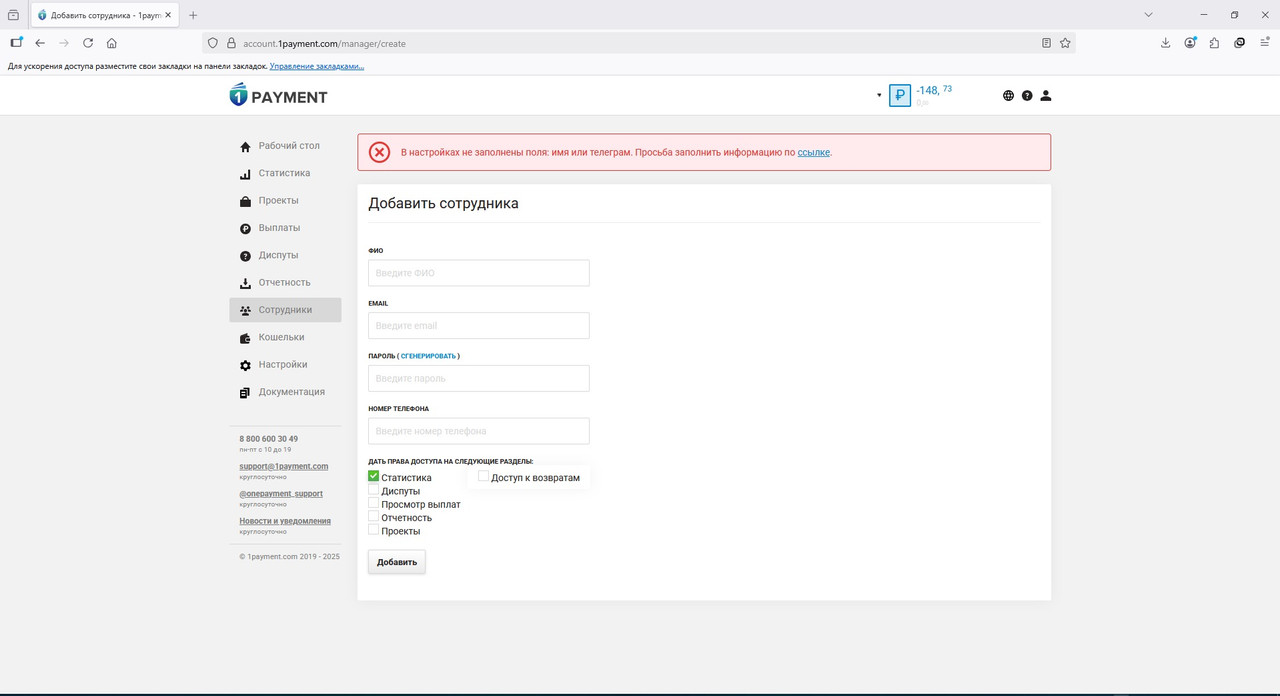
Staff
Add staff members with access to sections: statistics, projects, payouts, disputes, reporting, refund access.
Staff sign-in: https://clientpanel.1payment.com
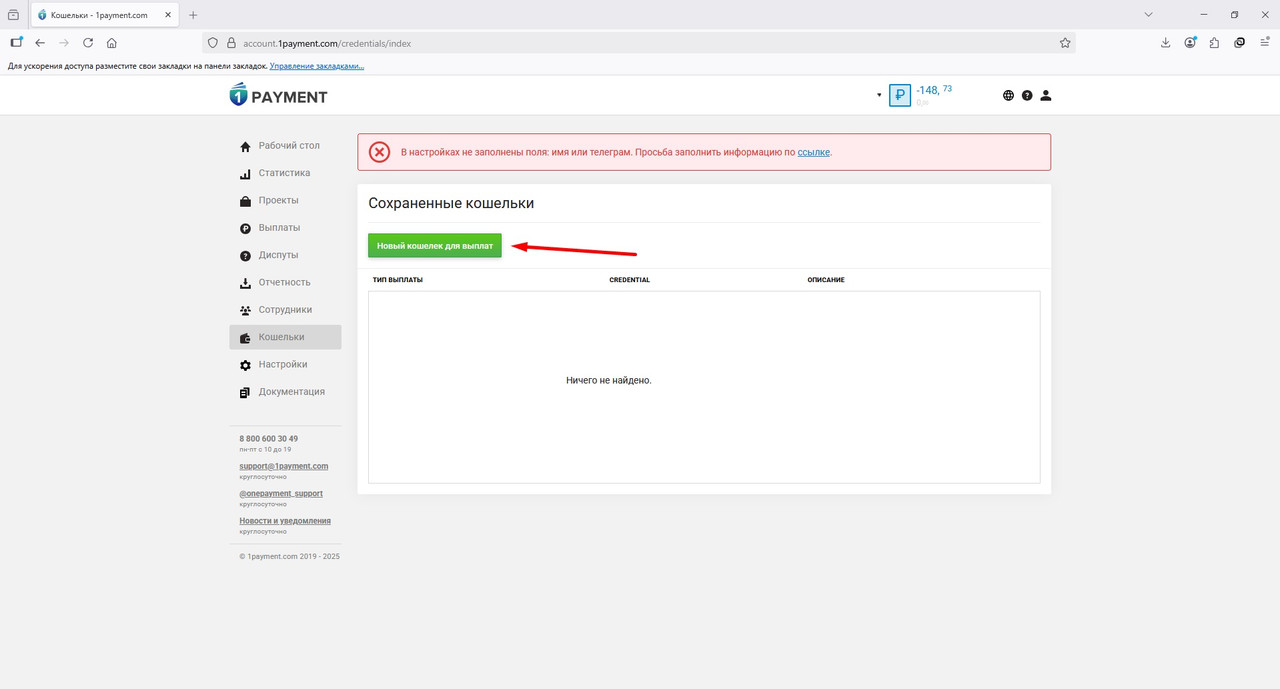
Wallets
Before adding a payout wallet (USDT or card), enable 2FA in Settings → Security:
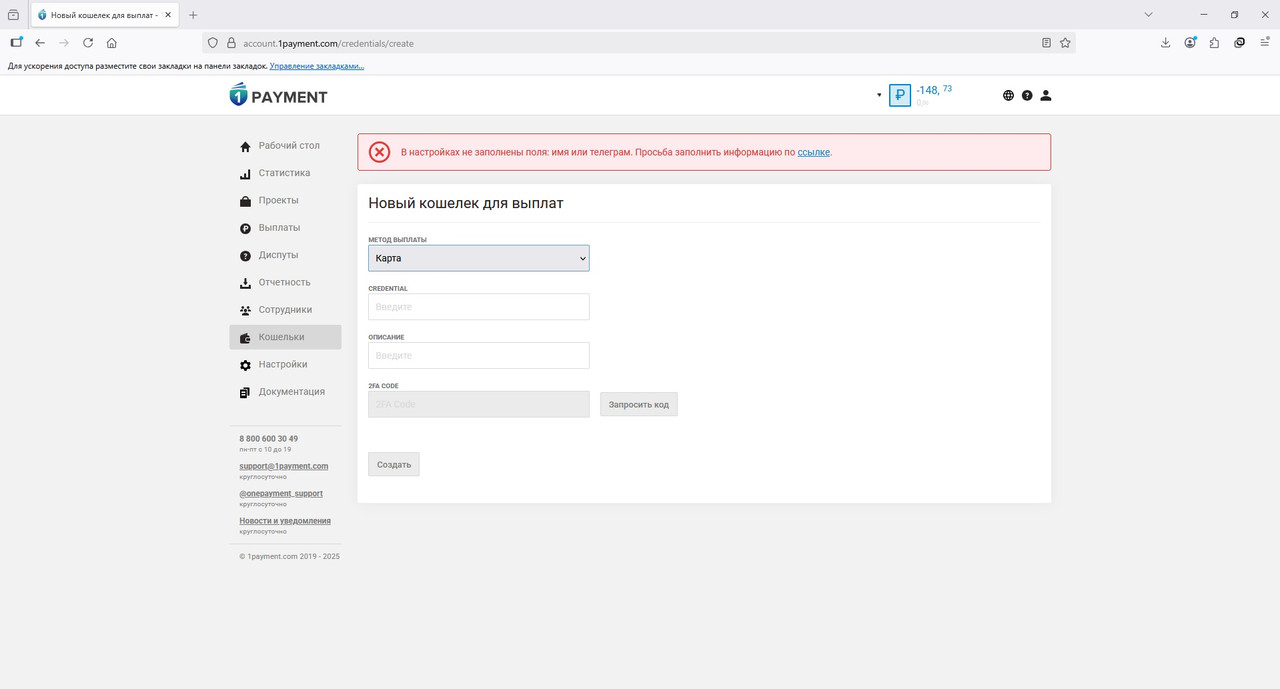
Available payout methods depend on enabled channels — confirm with your 1Payment account manager.
| Field | Description |
|---|---|
| Credential | Payment details (required). |
| Description | Optional label for the saved wallet. |
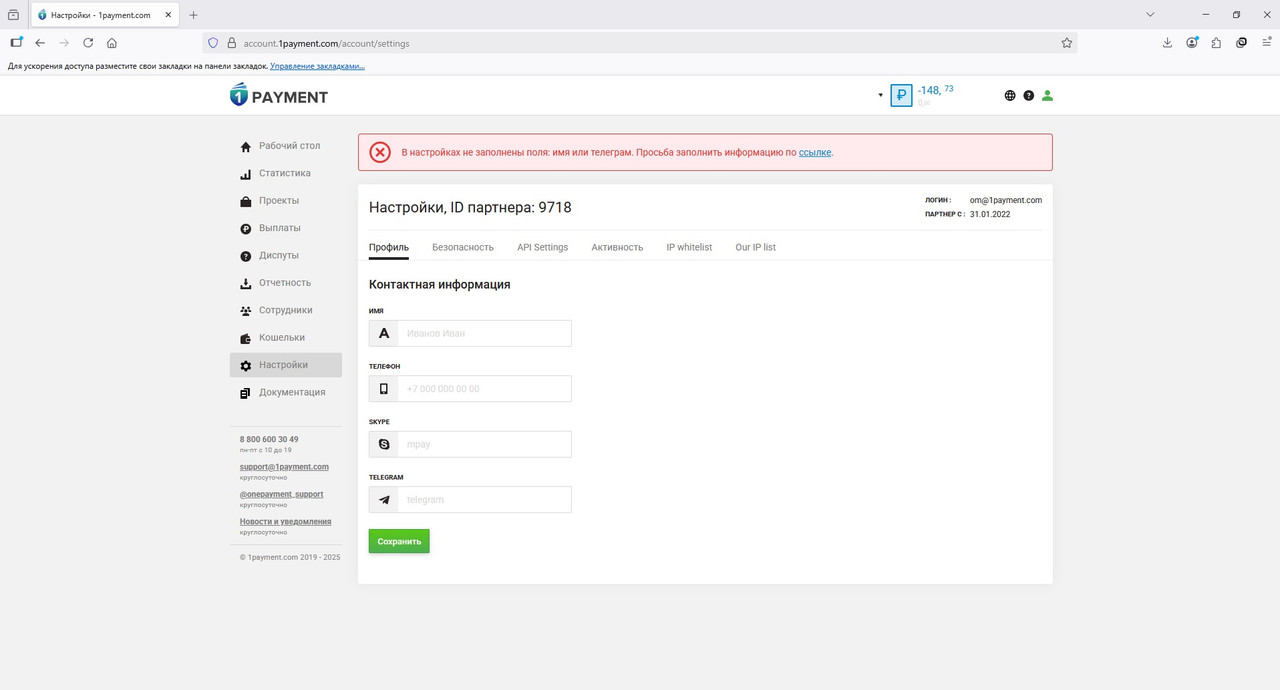
Settings
Profile
Contact details: name, phone, Skype, Telegram.
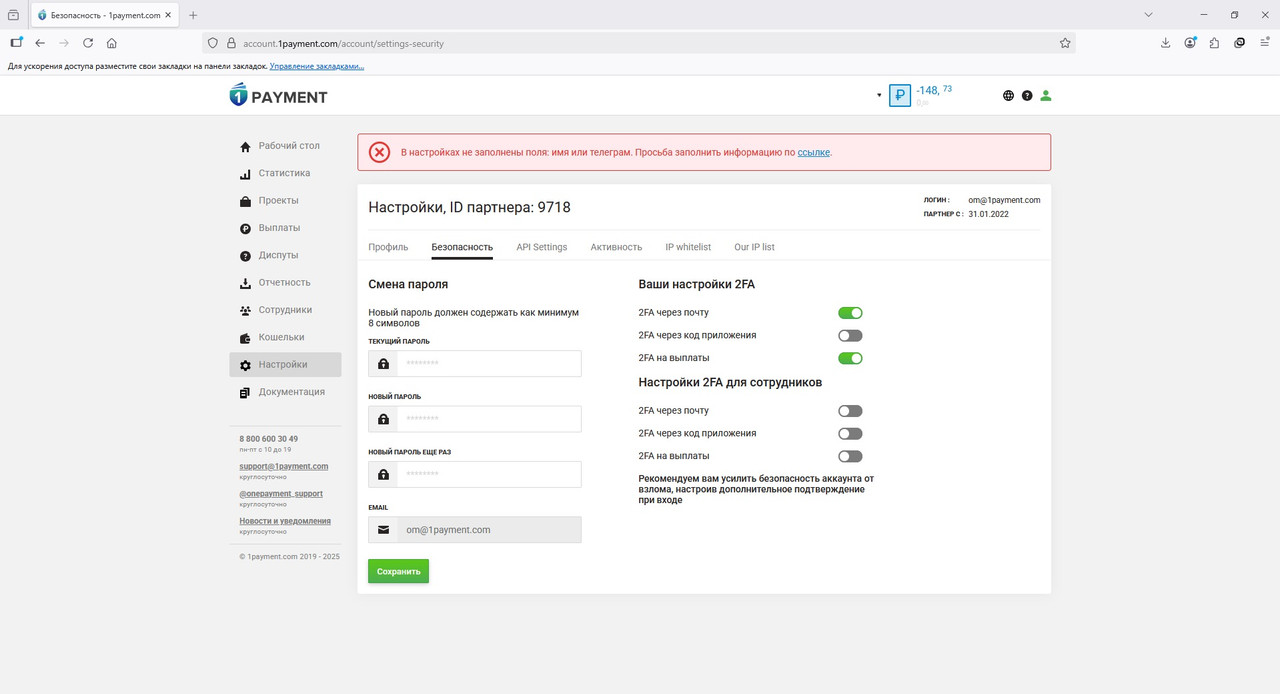
Security and 2FA
Change password, enable and disable two-factor authentication (2FA).
Four modes are available:
- No 2FA.
- 2FA via email.
- 2FA via QR code (authenticator app).
- 2FA via both email and QR code.
The QR code is shown when enabling the corresponding option. For staff, the QR is shown at sign-in if the partner enabled this option for them.
At sign-in, a session identifier (4 digits) is displayed so you enter the code for the correct session. A session lasts 60 seconds; resending the email is possible after the timer on the code entry page expires.
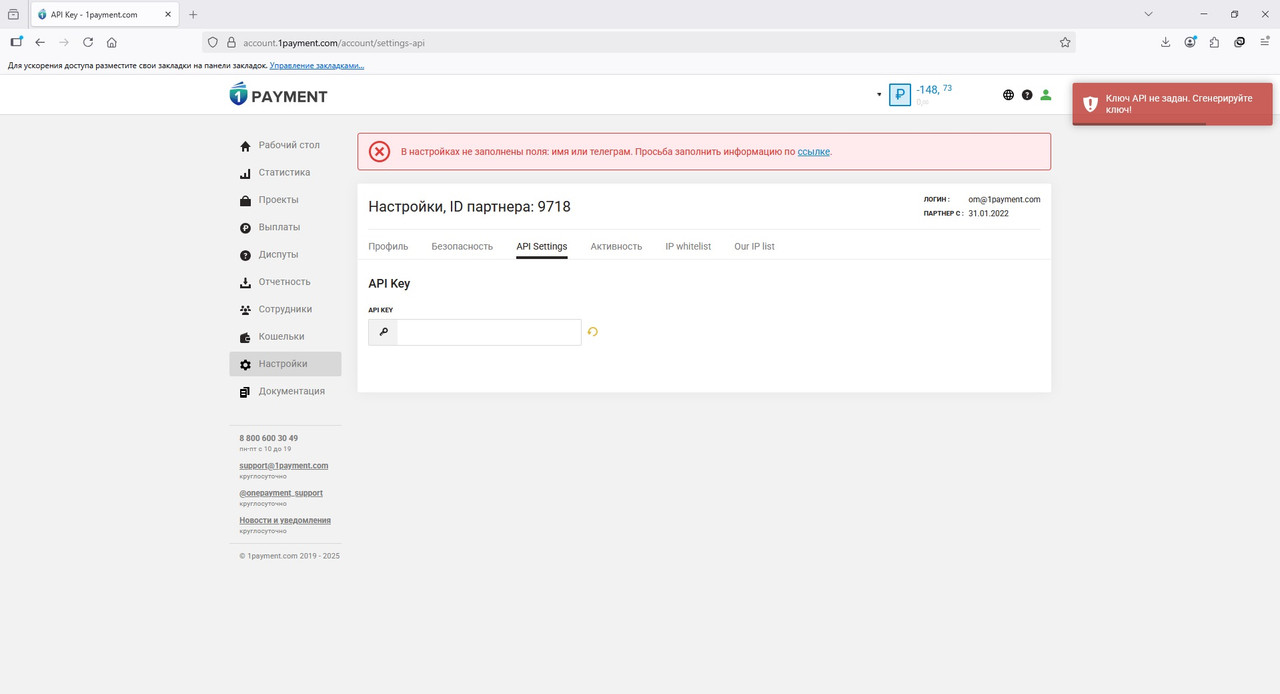
API settings
Global API KEY for all projects (if no project-level key is set):
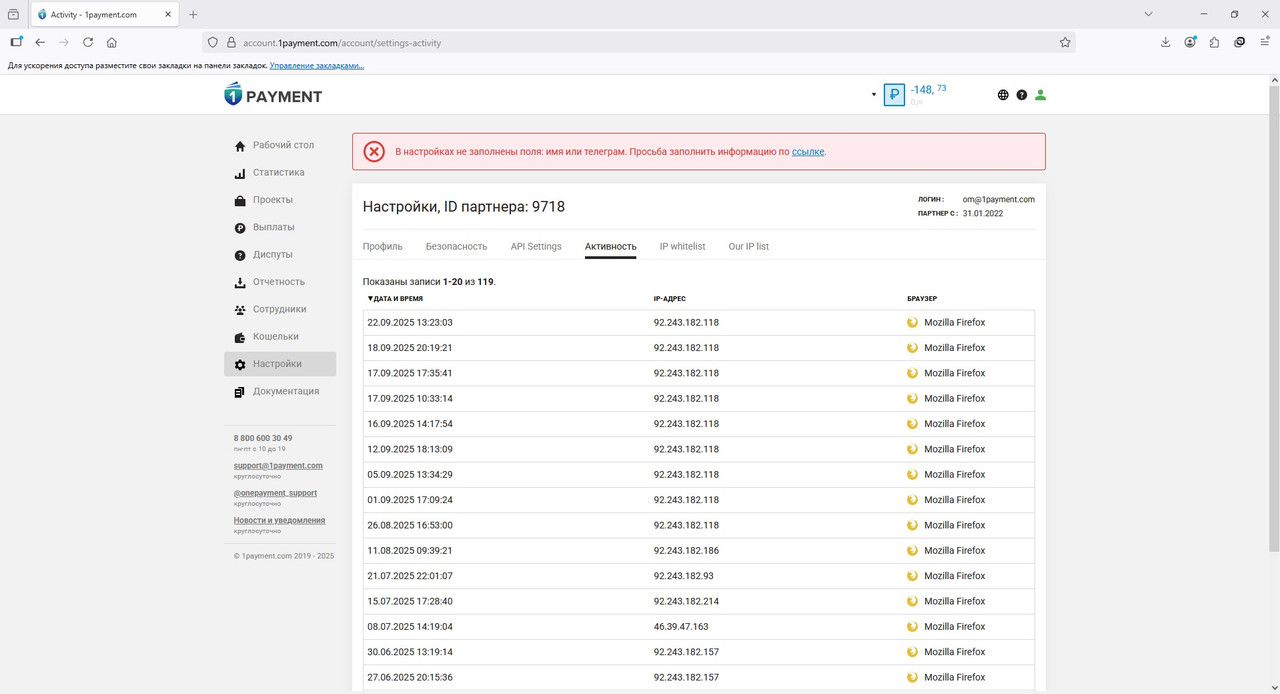
Activity
Sign-in log: time, IP, browser.
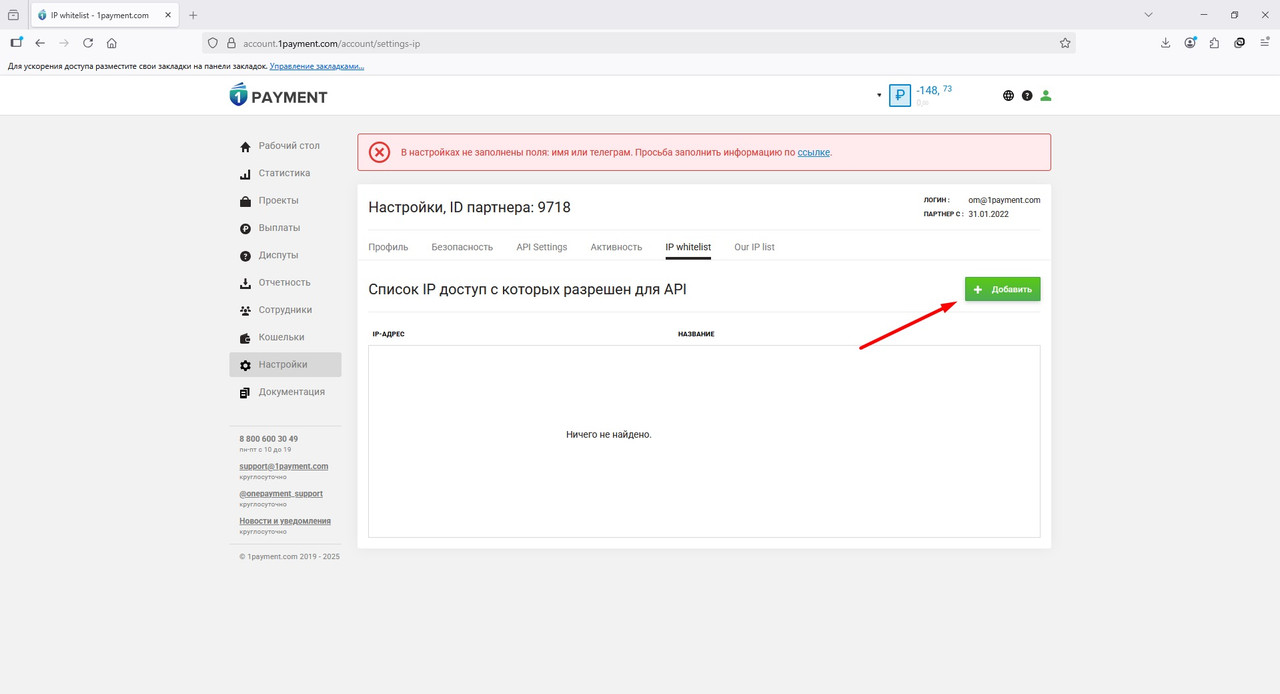
IP allowlist
Add IPs from which API requests are allowed. After adding at least one address, requests from other IPs are rejected:
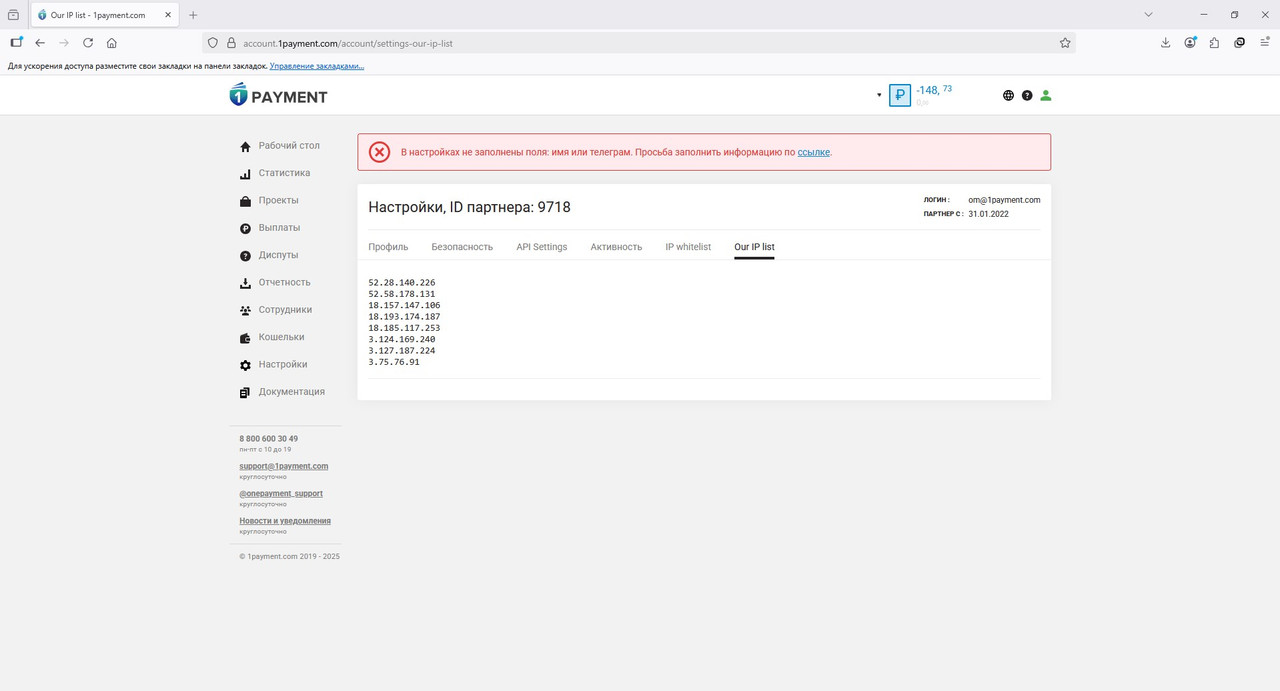
Our IP addresses
IPs from which 1Payment sends callbacks. Add them to your allowlist (for example, when using Cloudflare):
Support
- Email: support@1payment.com
- Telegram: t.me/onepayment_support
- Tickets in the personal account: tickets